Whether you’re dealing with difficult or simple nonconformances, your construction quality control plan should outline a systematic process to manage them. That way, you’ll consistently deliver quality results. And, your customers will have confidence that you tightly control specification deviations until you can find suitable resolutions.
In quality assurance circles, we don’t use the term nonconformance for all defects. Instead, we reserve the term for defects that you can’t quickly or cost effectively fix to meet your project’s quality standards.
Here’s an example of a simple nonconformance. If you poured a concrete foundation that was one inch too wide, you’d have to chip off the extra inch or rework the foundation to make it right.
This situation may not have an adverse affect on form, fit, or function. So, reworking it probably doesn’t make sense. However, if you decide to use-as-is, you’ll have to get your customer’s approval. This added step means you won’t be able to deal with the defect quickly, thus you’ll need to handle it as a nonconformance.
Step 1: Marking
The first step is to mark the area clearly to prevent use or inadvertent cover-up. This is especially important since deciding on the right corrective action or getting your customers’ approval can take some time.
You’d probably mark the foundation nonconformance with barrier tape. For other nonconformances, you can use paint, tape, a tag, or another easily observable signal. No matter how you choose to mark your nonconformances, make sure that they can’t be covered up by mistake.
Also, be sure to let your superintendents and inspectors know they must mark nonconformances. For more information on communicating your quality policies and procedures, see How to Write a Quality Control Communication Plan That Works.
Step 2: Controlling
If continuing to work can adversely affect quality or hide the defect, then stop work in the affected area until you can correct the nonconformance. Your field personnel should decide what, if any, limitations they should put on continuing to work in the area.
It’s also a quality best-practice to inspect previously completed work of a similar nature to make sure it does not have similar defects.
Step 3: Recording
Once you’ve marked and controlled the nonconformance area, the next step is to complete a nonconformance report. Use the report to describe the deviation and present it to a higher authority for a disposition (decision on how to proceed).
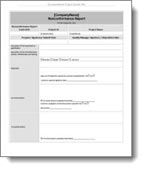 A nonconformance report also serves as a record of actions taken – including decisions that will be made on the disposition, corrective action, and preventive action for the nonconformance.
Step 4: Deciding on a Disposition
Next, you’ll make a decision on the disposition of the nonconformance.
You can dispose of a nonconformance in the one of four standardized ways: replace, repair, rework, and use-as-is. Consider the descriptions below when deciding the best course of action.
- REPLACE: Use this corrective action when replacing the nonconforming product or material with a conforming product or material will fix the deficiency.
- REPAIR: Use this corrective action when re-machining, reassembly, reprocessing, reinstallation, or completion of the required operations will fix the deficiency.
- REWORK: Use this corrective action when reworking will make the nonconformance acceptable for its intended use, even though it may not meet all specification requirements. Your customer must approve rework nonconformances.
- USE AS-IS: Use this corrective action when the nonconforming item is satisfactory for its intended use. Any use as-is items that do not meet all specification requirements must be approved by your customer.
Keep in mind; if the actions WILL NOT bring the nonconformance back into specification, then you must always seek your customer’s approval.
Step 5: Corrective Actions
Once you perform the corrective action, you’ll need to verify that you’ve eliminated the problem or corrected it to the level indicated by the disposition on the nonconformance report.
Sometimes corrective action training is required. This would be the case if personnel are not familiar with the type of repair or rework that must be done or they aren’t familiar with how to install a replacement.
Step 6: Reinspecting
Once you’ve corrected the nonconformance, reinspect your work and remove your markings.
Step 7: Preventing
Fixing problems found during quality inspections is not sufficient. You should always look for ways to improve quality and prevent similar problems from happening in the future.
As part of your systematic process, you should look at the frequency, severity, and detectability of the nonconformances you’ve found on your current as well as your past projects. You can do this by reviewing company quality performance and customer feedback.
Training is an aspect of prevention that you should not overlook. Once you’ve identified the causes of your nonconformances, include regular training and/or toolbox talks geared at preventing future occurrences.
Conclusion
Defects and nonconformances are a normal part of construction. Having a systematic approach to finding, resolving, and preventing future occurrences is the difference between a top-notch construction company and an average one.
About the Author - Ed Caldeira is founder of First Time Quality, LLC, specializing in submittal-ready construction QA/QC plan templates and custom quality plans as well as construction quality inspection and punchlist software.